

Yogurt is a staple in our home. Making it homemade saves us money, but more importantly I like knowing just what goes into the food we eat. It’s really an easy process, and I’ll share a few ways to make homemade yogurt without a yogurt maker.
I make yogurt from raw milk which we purchase from a farmer who really cares about how his cows are raised, and how the milk is handled after milking. You can, of course, choose pasteurized milk to make your yogurt.
The milk does end up being pasteurized when you make homemade yogurt from raw milk, but it’s a gentle pasteurization and no where near as destructive as factory-pasteurized milk. The bacteria in raw milk compete with those in yogurt and the yogurt will not set if the milk is not heated.
Making Homemade Yogurt
Yogurt making is simple and straight forward. Heat the milk, cool the milk, add the culture. And then keep it at a consistently warm temperature for several hours to allow the good bacteria to do its thing.
The variation in process comes with keeping the culture warm. There are a number of ways to do this. The two ways to make homemade yogurt without a yogurt maker that I’ll discuss in detail are using a dehydrator, and using a picnic cooler.
Slow cookers or the oven can be used but the temperature has to be closely monitored. Since neither will keep low enough temperatures, they have to be turned off and on to maintain the correct temperature. You could even experiment with using a heating pad, but again, watch that temperature.
First Steps to Yogurt Making
Whether you decide to use a dehydrator, or a picnic cooler to keep your culture warm, the first steps are the same.
Warm your milk to 185°F, then cool to 115°F. Then add your culture and allow to ferment for about 8 hours. Full instructions are in the recipe card at the end of this post.
Using a Dehydrator
To use a dehydrator to keep your yogurt warm as it cultures, simply remove the trays, and place your jars of yogurt in the bottom of the dehydrator. I use an Excalibur Dehydrator.
If I need whey for a fermentation recipe, I’ll just place the entire pot, rather than individual jars, into the dehydrator since I’m going to be straining the yogurt (see Greek Yogurt below).
But if you do want it ready to serve, 8 ounce glass canning jars work perfectly. When I use the dehydrator to make my yogurt, I don’t put a lid on the jars, (or the pot), so that excess moisture can evaporate.
Using a Picnic Cooler
If you don’t have a dehydrator, a picnic cooler works really well to keep the milk warm as it cultures. Simply place your jars (or pot) of yogurt into a cooler and then place canning jars of boiling water into the cooler to keep it warm. Be sure that the cooler lid is on tightly. Replace the water with freshly boiled water every few hours until your yogurt is set, generally about 8 hours.
After about 8 hours in either the dehydrator or cooler, the yogurt will be set. It’s generally a little wiggly but will set more as it cools in the refrigerator.
Greek Yogurt
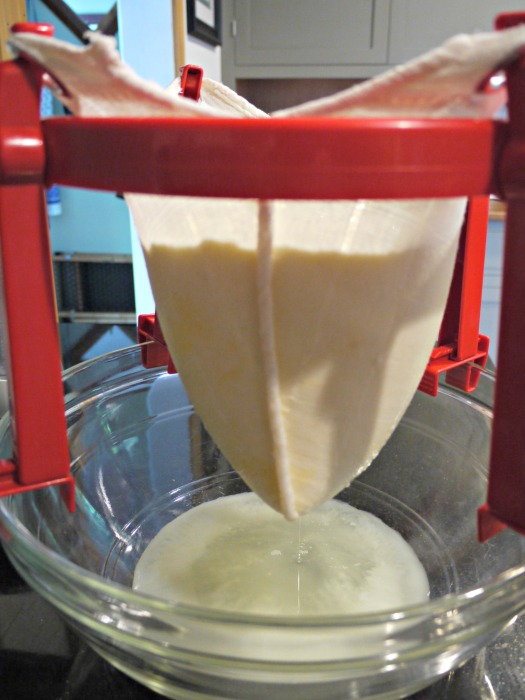
 Greek yogurt is yogurt that has been strained to remove some or all of the whey so that the yogurt will be quite thick. Cool the yogurt in the refrigerator first, and then strain.
If you are only straining a small amount of yogurt, a paper coffee filter placed into a mesh strainer over a jar works just fine.
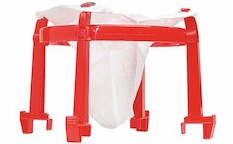
Since I generally make a gallon of yogurt at at time, I use a large jelly bag (juice strainer) like the one pictured to strain my yogurt.
If Your Yogurt Isn’t as Thick as You’d Like
There are a few things to keep in mind if you want to consistently make thick yogurt:
- The yogurt will only be as good as the culture you begin with. I’ve tried lots of different brands with live cultures as my starter, and I’ve had best results with Stonyfield Whole Milk Plain Yogurt.
- Whole milk sets firmer than low-fat milk. Adding cream helps, too.
- If using raw milk, use the freshest possible. Don’t open a gallon of milk and use it for other things for a few days, and then decide to use the rest for yogurt. It is best freshly purchased, and freshly opened.
- If all else fails, strain it to make Greek yogurt (see above).
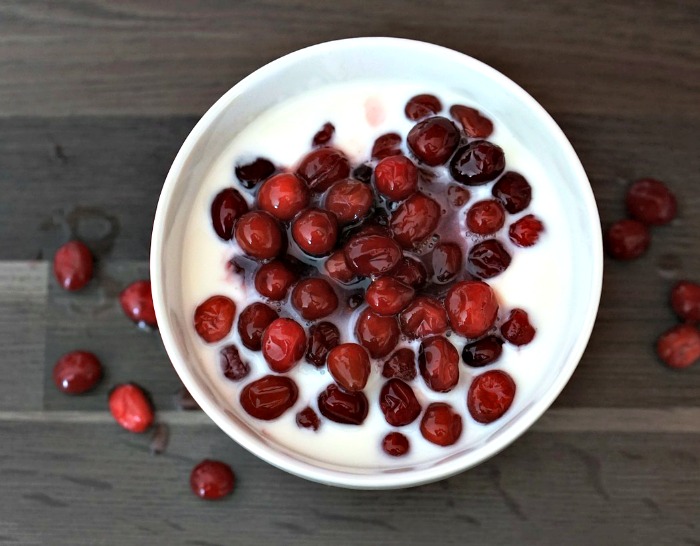
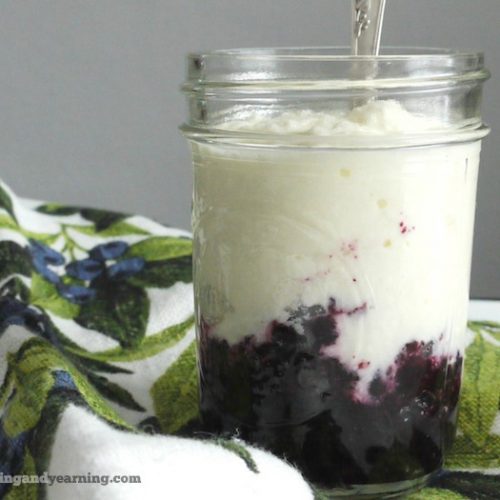
Yogurt Toppings
What you use to top your yogurt is only limited by your imagination.
You can use:
- honey
- maple syrup
- coconut sugar,
- apple sugar
- nuts
- seeds
- fruit
- low-sugar jams or jellies
- granola
- toasted coconut
- and even chocolate
Try combining toppings and see what great flavor combinations you can come up with!

Homemade Yogurt
Ingredients
- 1 quart milk *
- 1/4 cup plain yogurt **
Instructions
- On medium heat, heat the milk to 185°F, stirring frequently. Use a candy or meat thermometer to be accurate.
- Remove the milk from the heat and cool to 115°F.
- Stir in 1/4 cup of yogurt from a previous batch. You may use plain, good quality store bought yogurt if this is your first batch.
- Pour yogurt into individual jars, if desired, and keep warm for 6–8 hours, or until set. 110°F–115°F is ideal. (See post for ideas on how to keep warm without using a yogurt maker).
Notes
Thank you for visiting Learning And Yearning. May "the LORD bless you and keep you; the LORD make his face shine upon you and be gracious to you; the LORD turn his face toward you and give you peace." Num 6:24-26
Suzanne says
Someone on Facebook showed how to make coconut yogurt with a can of coconut milk or cream and a probiotic. Pour the can in a glass container. pour in a probiotic capsule. Let it sit for 24-48 hours and then refrigerate.
Susan Vinskofski says
Hi Suzanne, I’m wondering if you every tried that with cow’s milk?
Linda Summer says
Another way that was shown to me years ago was to just wrap the pot up with the lid on in a bundle of blankets immediately after stirring in the starter. I was surprised at the simplicity and how well it worked. I usually added my starter in as the temp was falling past 120 degrees.
Susan Vinskofski says
Great idea, Linda. Thank you for sharing that.
Kristen says
Thanks for this great post. I love being able to do things without having to buy a product! I totally love the cooler idea. My husband and I have wanted to make yogurt for some time now but we’re apprehensive because we have little kids. Maybe you can help ease my mind a bit! I know people have been making yogurt for centuries so it really should be easy, but having never done it I am afraid something will go wrong with the bacteria levels & I’m going to make my whole family sick!! Is there a way to test it, or is it really way safer than I’m assuming? (Probably!) Thanks for any info you can give me, and thanks again for a cool post!
Susan Vinskofski says
Hi Kristen! I’m so glad I’ve encouraged you to at least consider making your own yogurt. I guess I’m pretty easy going about this type of thing – as you’ve said, people have been making yogurt for centuries, and they didn’t have the modern kitchen that I do. I don’t know how you could test the yogurt, but in my many years of making it, we’ve never had a bad batch or been sickened by my homemade yogurt. I hope you give it a try. (Test it on you and your husband first. LOL).
Kristen says
We made it! We have made 3 quarts of yogurt now; the first starter we used was from the yogurt we normally buy. Then we made some using our own starter & another using the store-bought stuff so we could compare. I actually used the towel method someone mentioned in your comments. My brother-in-law worked with a girl from Romania that made her own yogurt every night & that’s how she made hers.
Anyway, it turned out wonderfully. We are so excited to have finally tried this & amazed at how simple it is. It tastes better than the stuff from the store & will save us a crazy amount of money. Thanks again!
Susan Vinskofski says
You’ve put a great big smile on my face today, Kristen. I knew you could do it! The towel idea is a really good one.
GB says
Very excited to try this!!! I am a complete newby to this. ? I saw on your directions for the recipe that you mentioned the possibility of reusing some of your previous yogurt as your starter once you make a batch. Can you continue on with using your own yogurt for the starter or will you eventually need to buy more yogurt for the stater? I have heard that your yogurt will eventually weaken in the bacteria(which does not make since to me) strength and that you will only be able to make a certain amount of batches when using your own as the starter. Looking for clarity. Thank you SO much for your site! I am VERY inspired! ?
Susan Vinskofski says
Thanks for your question! Yes, I have found that over time the starter does seem less potent for lack of better word. That is not to say that you cannot get many, many batches by just using your homemade yogurt. You’ll notice that it is not thickening as much and then you’ll know it’s time to start afresh.