When we purchase pastured chickens from our local farmer, we always buy them whole. Many farmers only sell whole chickens, although ours does offer the option of purchasing them cut up. It is a considerable savings to buy them whole, and to cut up a whole chicken into parts takes only a few minutes.
Benefits of Cutting a Whole Chicken Yourself
- Buying a chicken already cut up is more expensive per pound. It’s a great savings to do it yourself.
- You’ll have a lot more bones for making homemade bone broth. When we purchase whole chickens from a local farmer, it comes with the neck still attached. This makes great broth, and fits in with our ethic to use the whole chicken. We get the feet, liver, and heart as well.
- It will get you ready for the day when you can raise chickens for meat yourself. Every new skill you learn will come in handy one day!
To Cut Up a Whole Chicken
What you need:
- a sharp knife
- a cutting board
- kitchen shears (not a necessity, but very helpful)
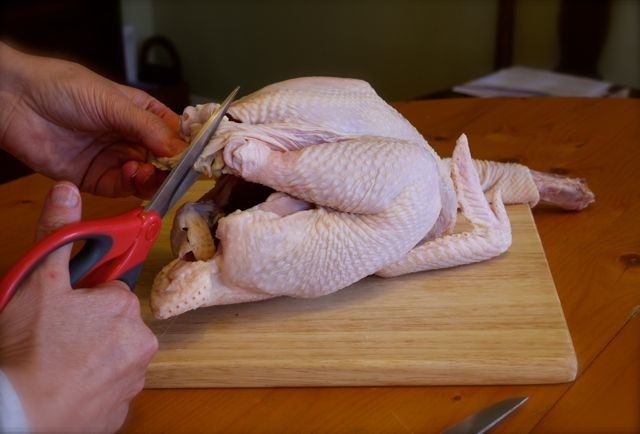
To cut up a whole chicken into parts, begin by cutting the skin that is holding the legs in place using shears.
Pull the whole leg away from the body and pop the joint.
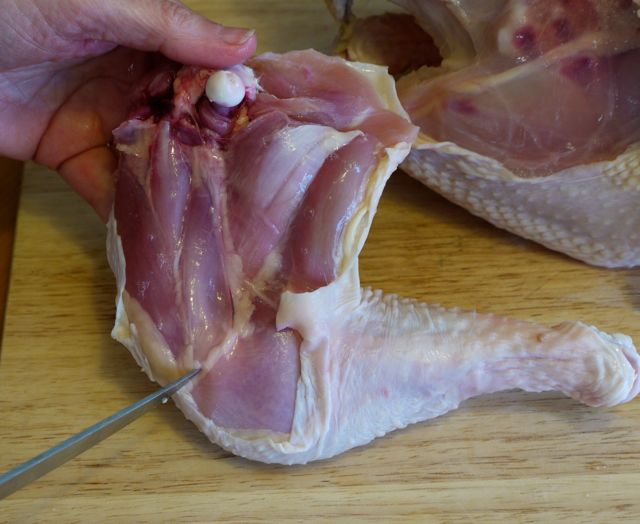
Hold the leg up, letting gravity help and cut across the top of the thigh keeping close to the body of the chicken so that you get all of the dark meat.
See that line of fat? That is the cutting line to separate the leg from the thigh to cut a whole chicken into parts.
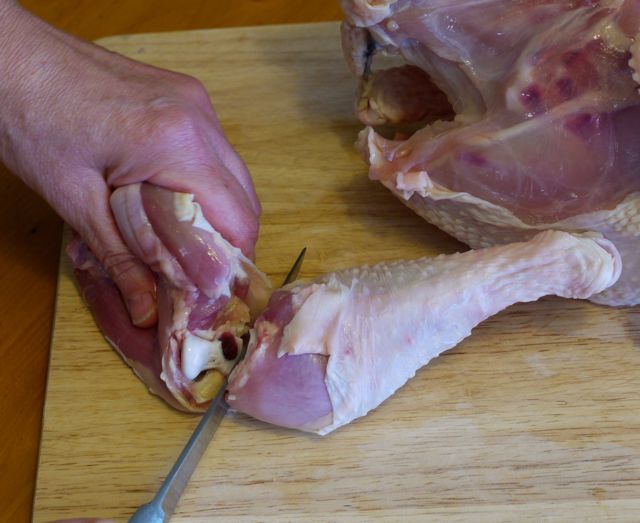
Cut through the joint separating the leg from the thigh.
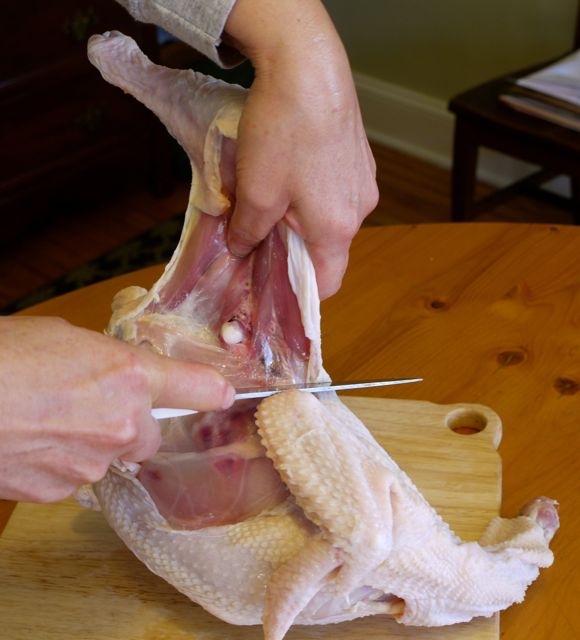
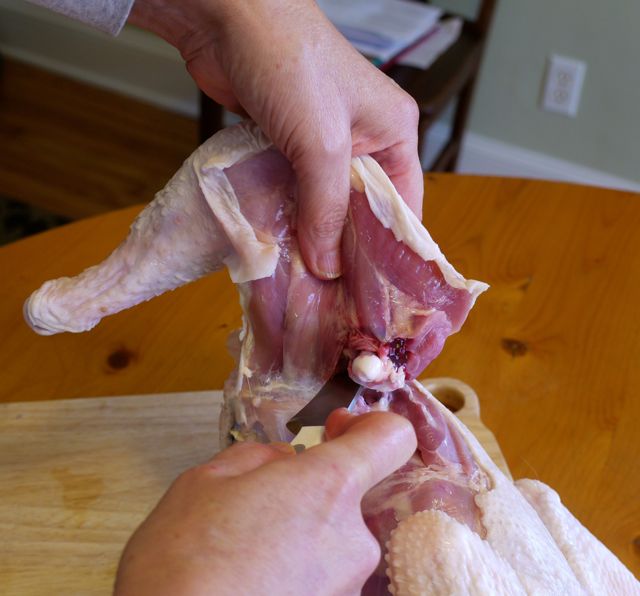
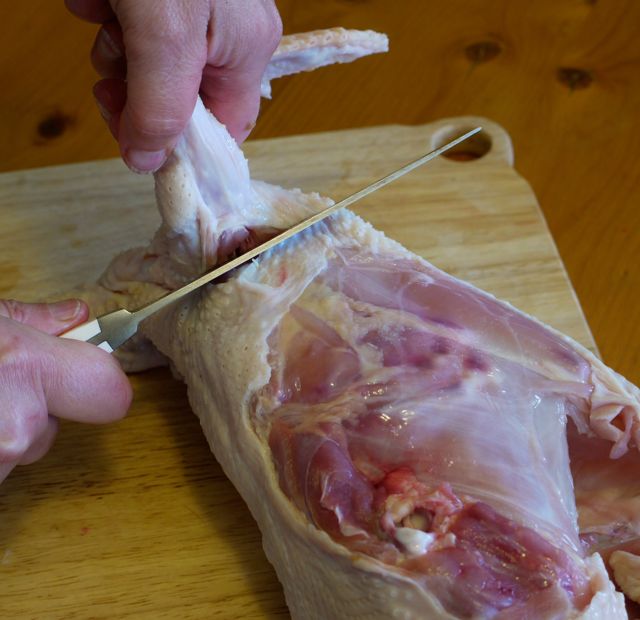
Now remove the wing. Stick your thumb into the base of the wing feeling for the joint. Pull back to pop the joint.
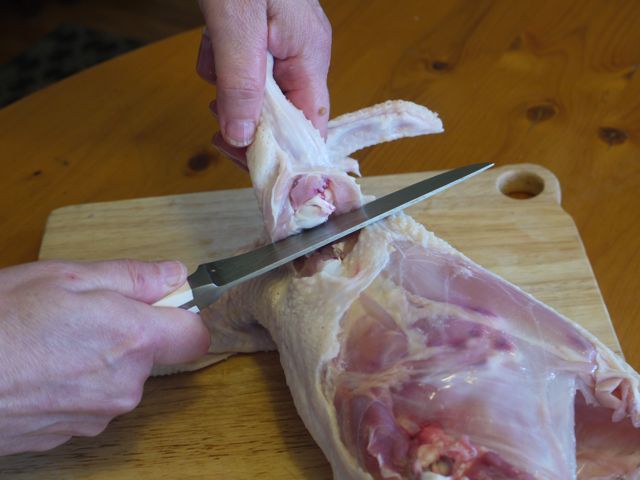
Cut through the joint removing the wing. Repeat the instructions for removing the other leg and wing.
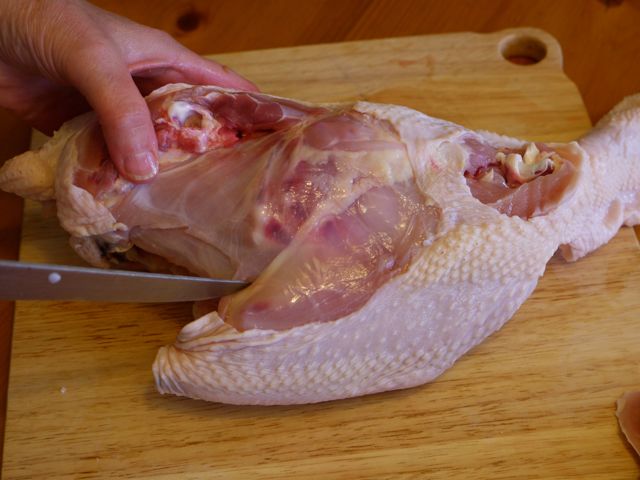
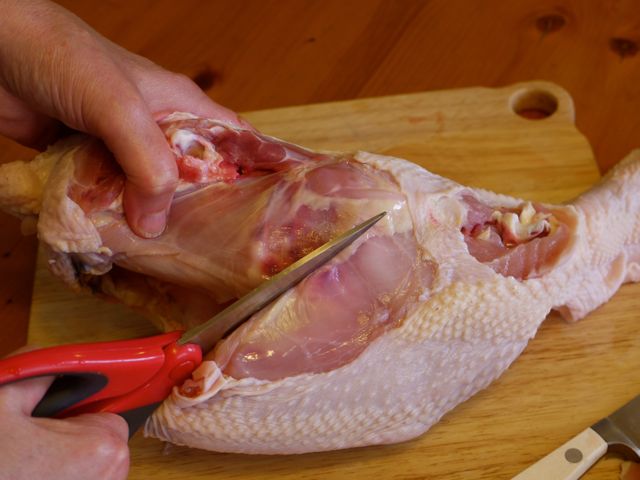
Note the line of fat between the breast and the back.
Cut along this line. I find that shears work best when you wish to cut a whole chicken into parts.
Cut along the fat line on both sides of the chicken.
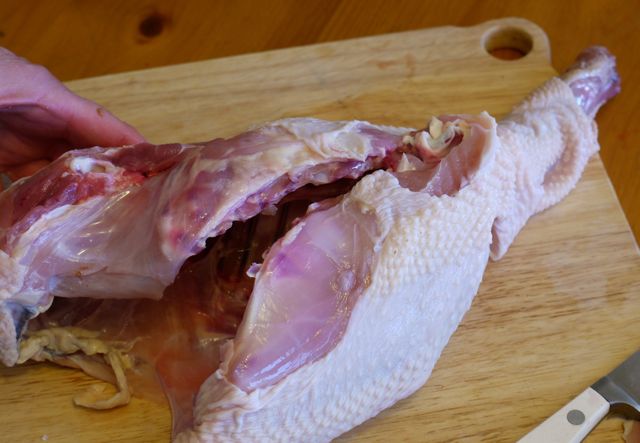
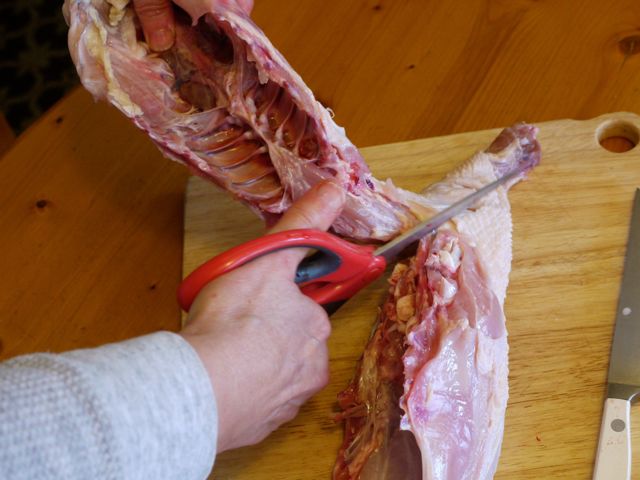
If your chicken’s neck is still attached, pull the back and breast sections apart from each other to help separate the bones.
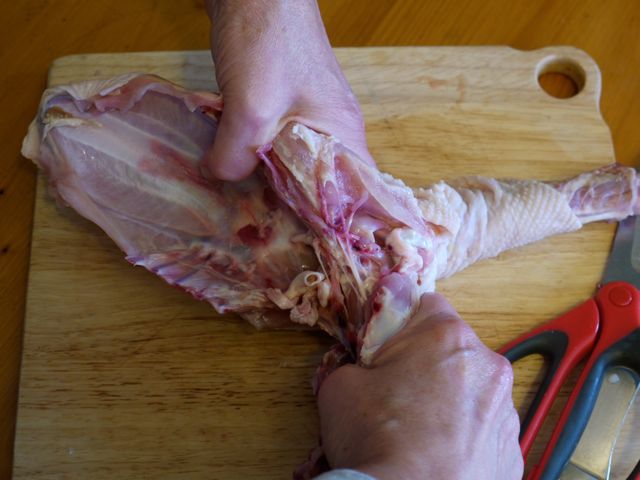
Using shears cut through the small bones to completely remove the back and neck from the breast.
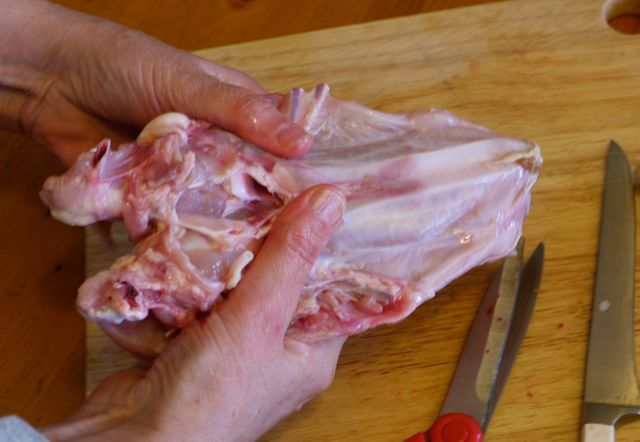
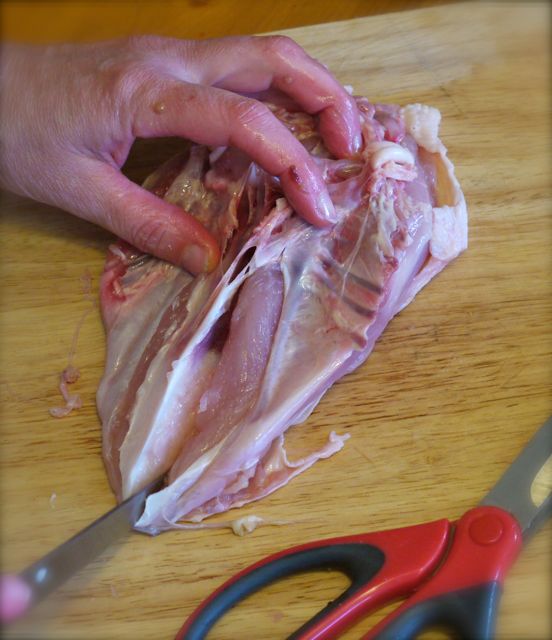
Turn breast skin side down. Use your knife to just cut through the cartilage at the base of the sternum.
Lift the breast and bend backwards to break the membrane that covers the sternum.
Run your thumb underneath the bone to help separate it from the meat. Sometimes the entire bone comes out easily. I find that with the heritage chickens that I purchase, this bone does not come out easily.
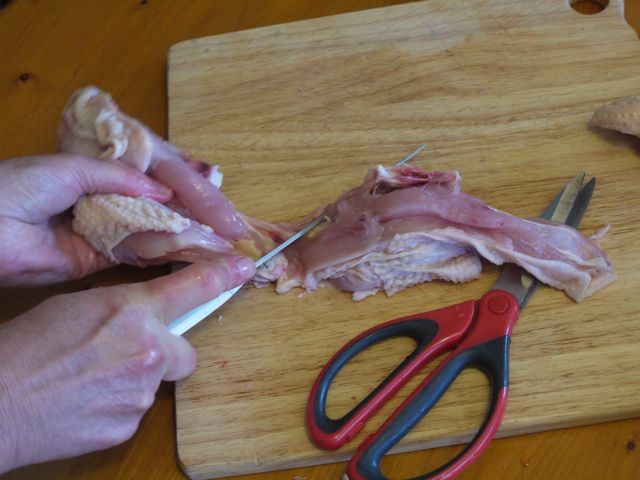
Cut the breast in half running your knife along the sternum if this bone is still intact.
Complete cutting the breast in half.
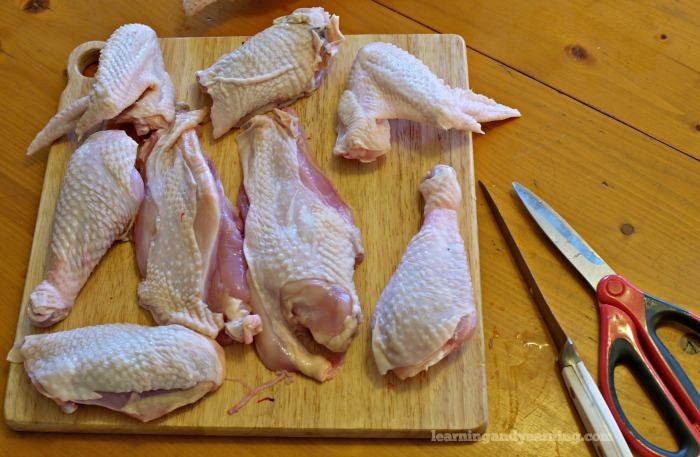
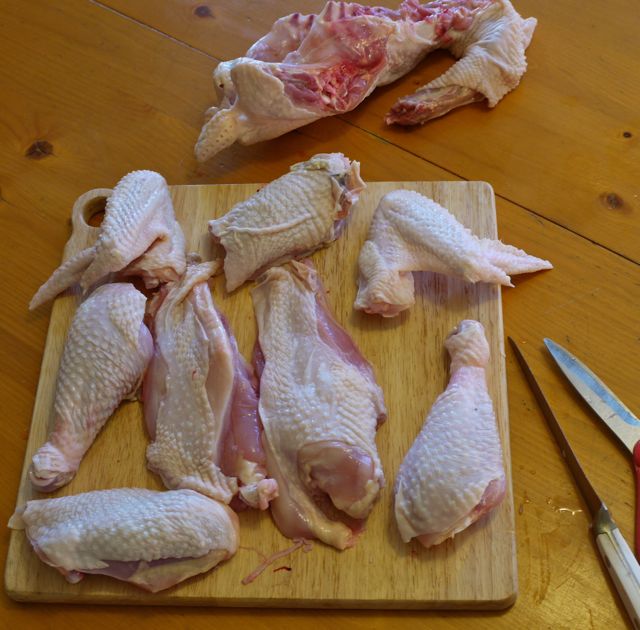
The whole chicken is now cut into eight pieces ready to cook. I freeze the back and neck in a zip lock bag until I collect several and use these to make stock.
You Did It!
I highly recommend brining pastured chicken before cooking. It makes the bird moist and tender. And here’s my recipe for making broth from the bones, necks and back of the chicken.
To cut a whole chicken into parts takes a little bit of practice, but is a quick process, and easy to learn.
What’s your favorite way to cook chicken parts?
More Chicken Posts You’ll Love
Making Chicken Bone Broth in a Slow Cooker (And Ways to Use It)
How to Spatchcock (Butterfly) a Chicken
Spatchcock Roasted Chicken with Smokey Turmeric Marinade
Chicken Cacciatore with Brined Chicken
How to Cut Up a Whole Chicken
Ingredients
- 1 whole pastured chicken
- sharp knife
- cutting board
- kitchen shears not a necessity, but very helpful
Instructions
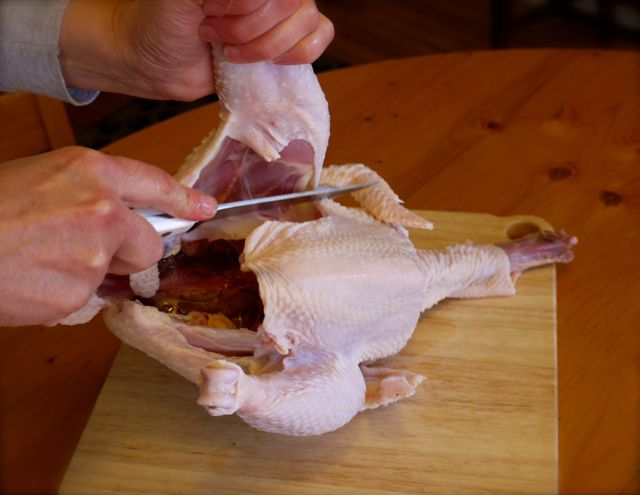
- Begin by cutting the skin that is holding the legs in place using shears.
- To remove the legs and thighs, cut into the skin where the thigh connects to the body.
- Pull the whole leg away from the body and pop the joint.
- Hold the leg up, letting gravity help and cut across the top of the thigh keeping close to the body of the chicken so that you get all of the dark meat.
- Notice the line of fat in between the thigh and leg. That is the cutting line to separate the leg from the thigh.
- Cut through the joint separating the leg from the thigh.
- Now remove the wing. Stick your thumb into the base of the wing feeling for the joint. Pull back to pop the joint.
- Cut through the joint removing the wing. Repeat the instructions for removing the other leg and wing.
- Note the line of fat between the breast and the back.
- Cut along this line. I find that shears work best.
- Cut along the fat line on both sides of the chicken.
- If your chicken’s neck is still attached, pull the back and breast sections apart from each other to help separate the bones.
- Using shears cut through the small bones to completely remove the back and neck from the breast.
- Turn breast skin side down. Use your knife to just cut through the cartilage at the base of the sternum.
- Lift the breast and bend backwards to break the membrane that covers the sternum.
- Run your thumb underneath the bone to help separate it from the meat. Sometimes the entire bone comes out easily. I find that with the heritage chickens that I purchase, this bone does not come out easily.
- Cut the breast in half running your knife along the sternum if this bone is still intact.
- Complete cutting the breast in half.
- The whole chicken is now cut into eight pieces ready to cook. I freeze the back and neck in a zip lock bag until I collect several and use these to make bone broth.

