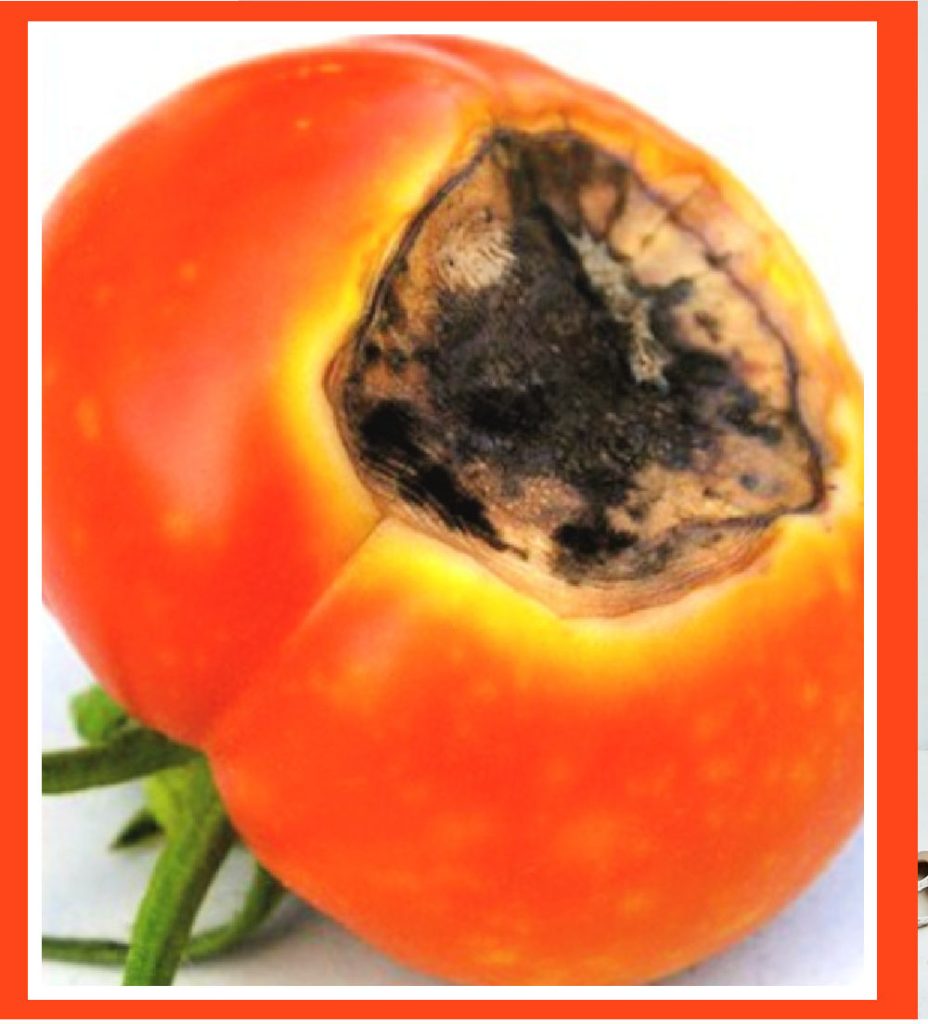
Leathery Area on the Blossom End of Tomatoes
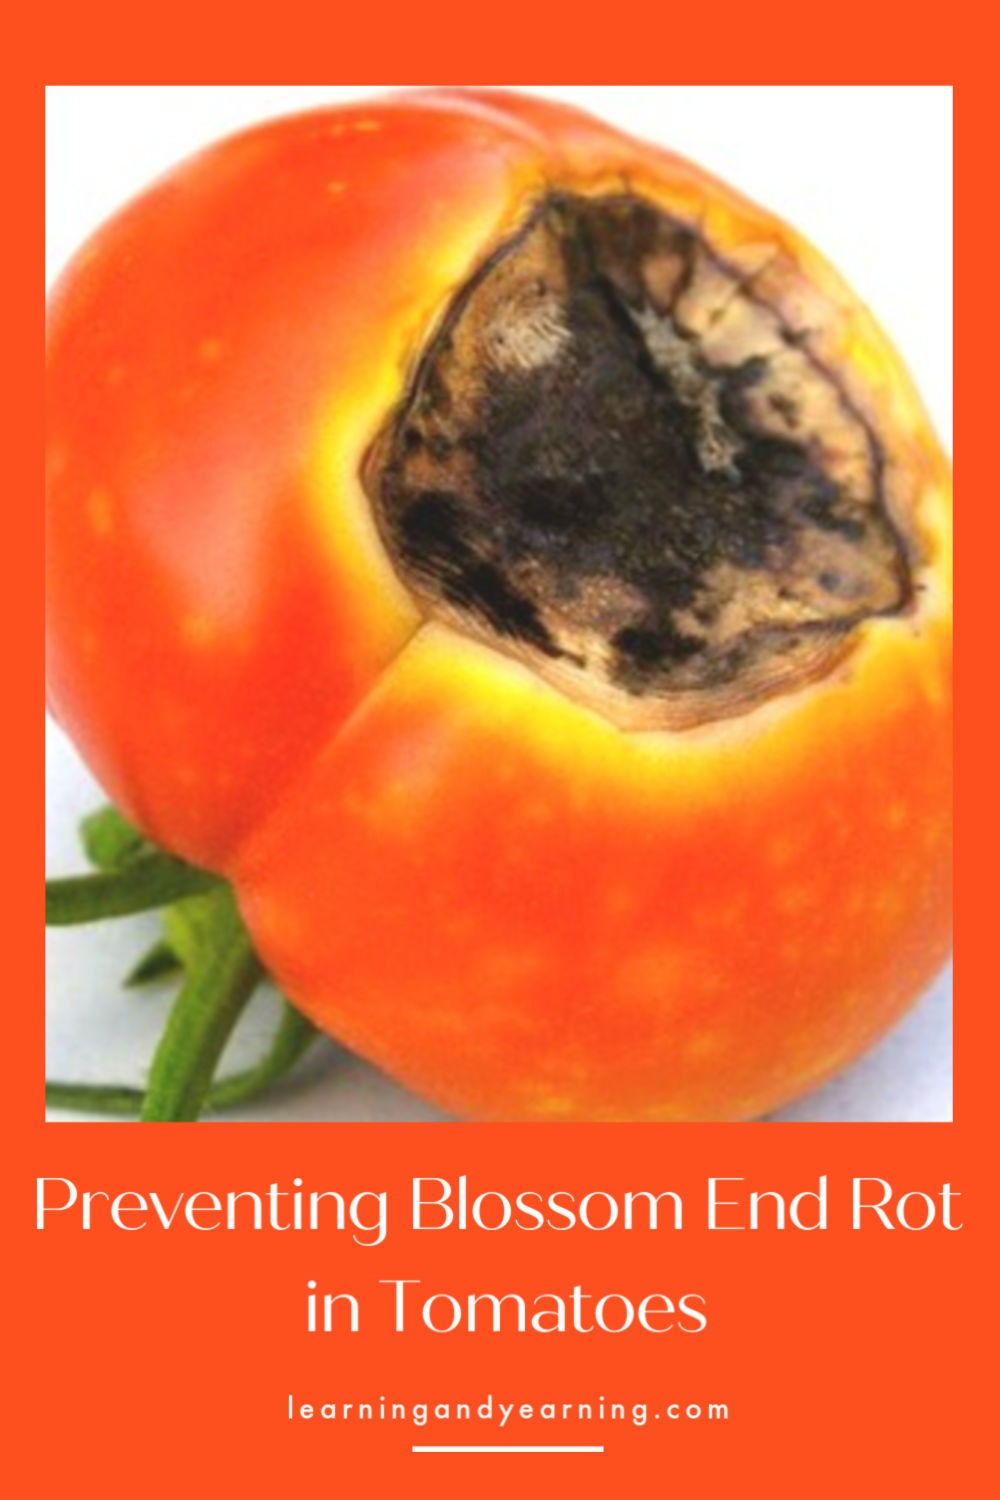
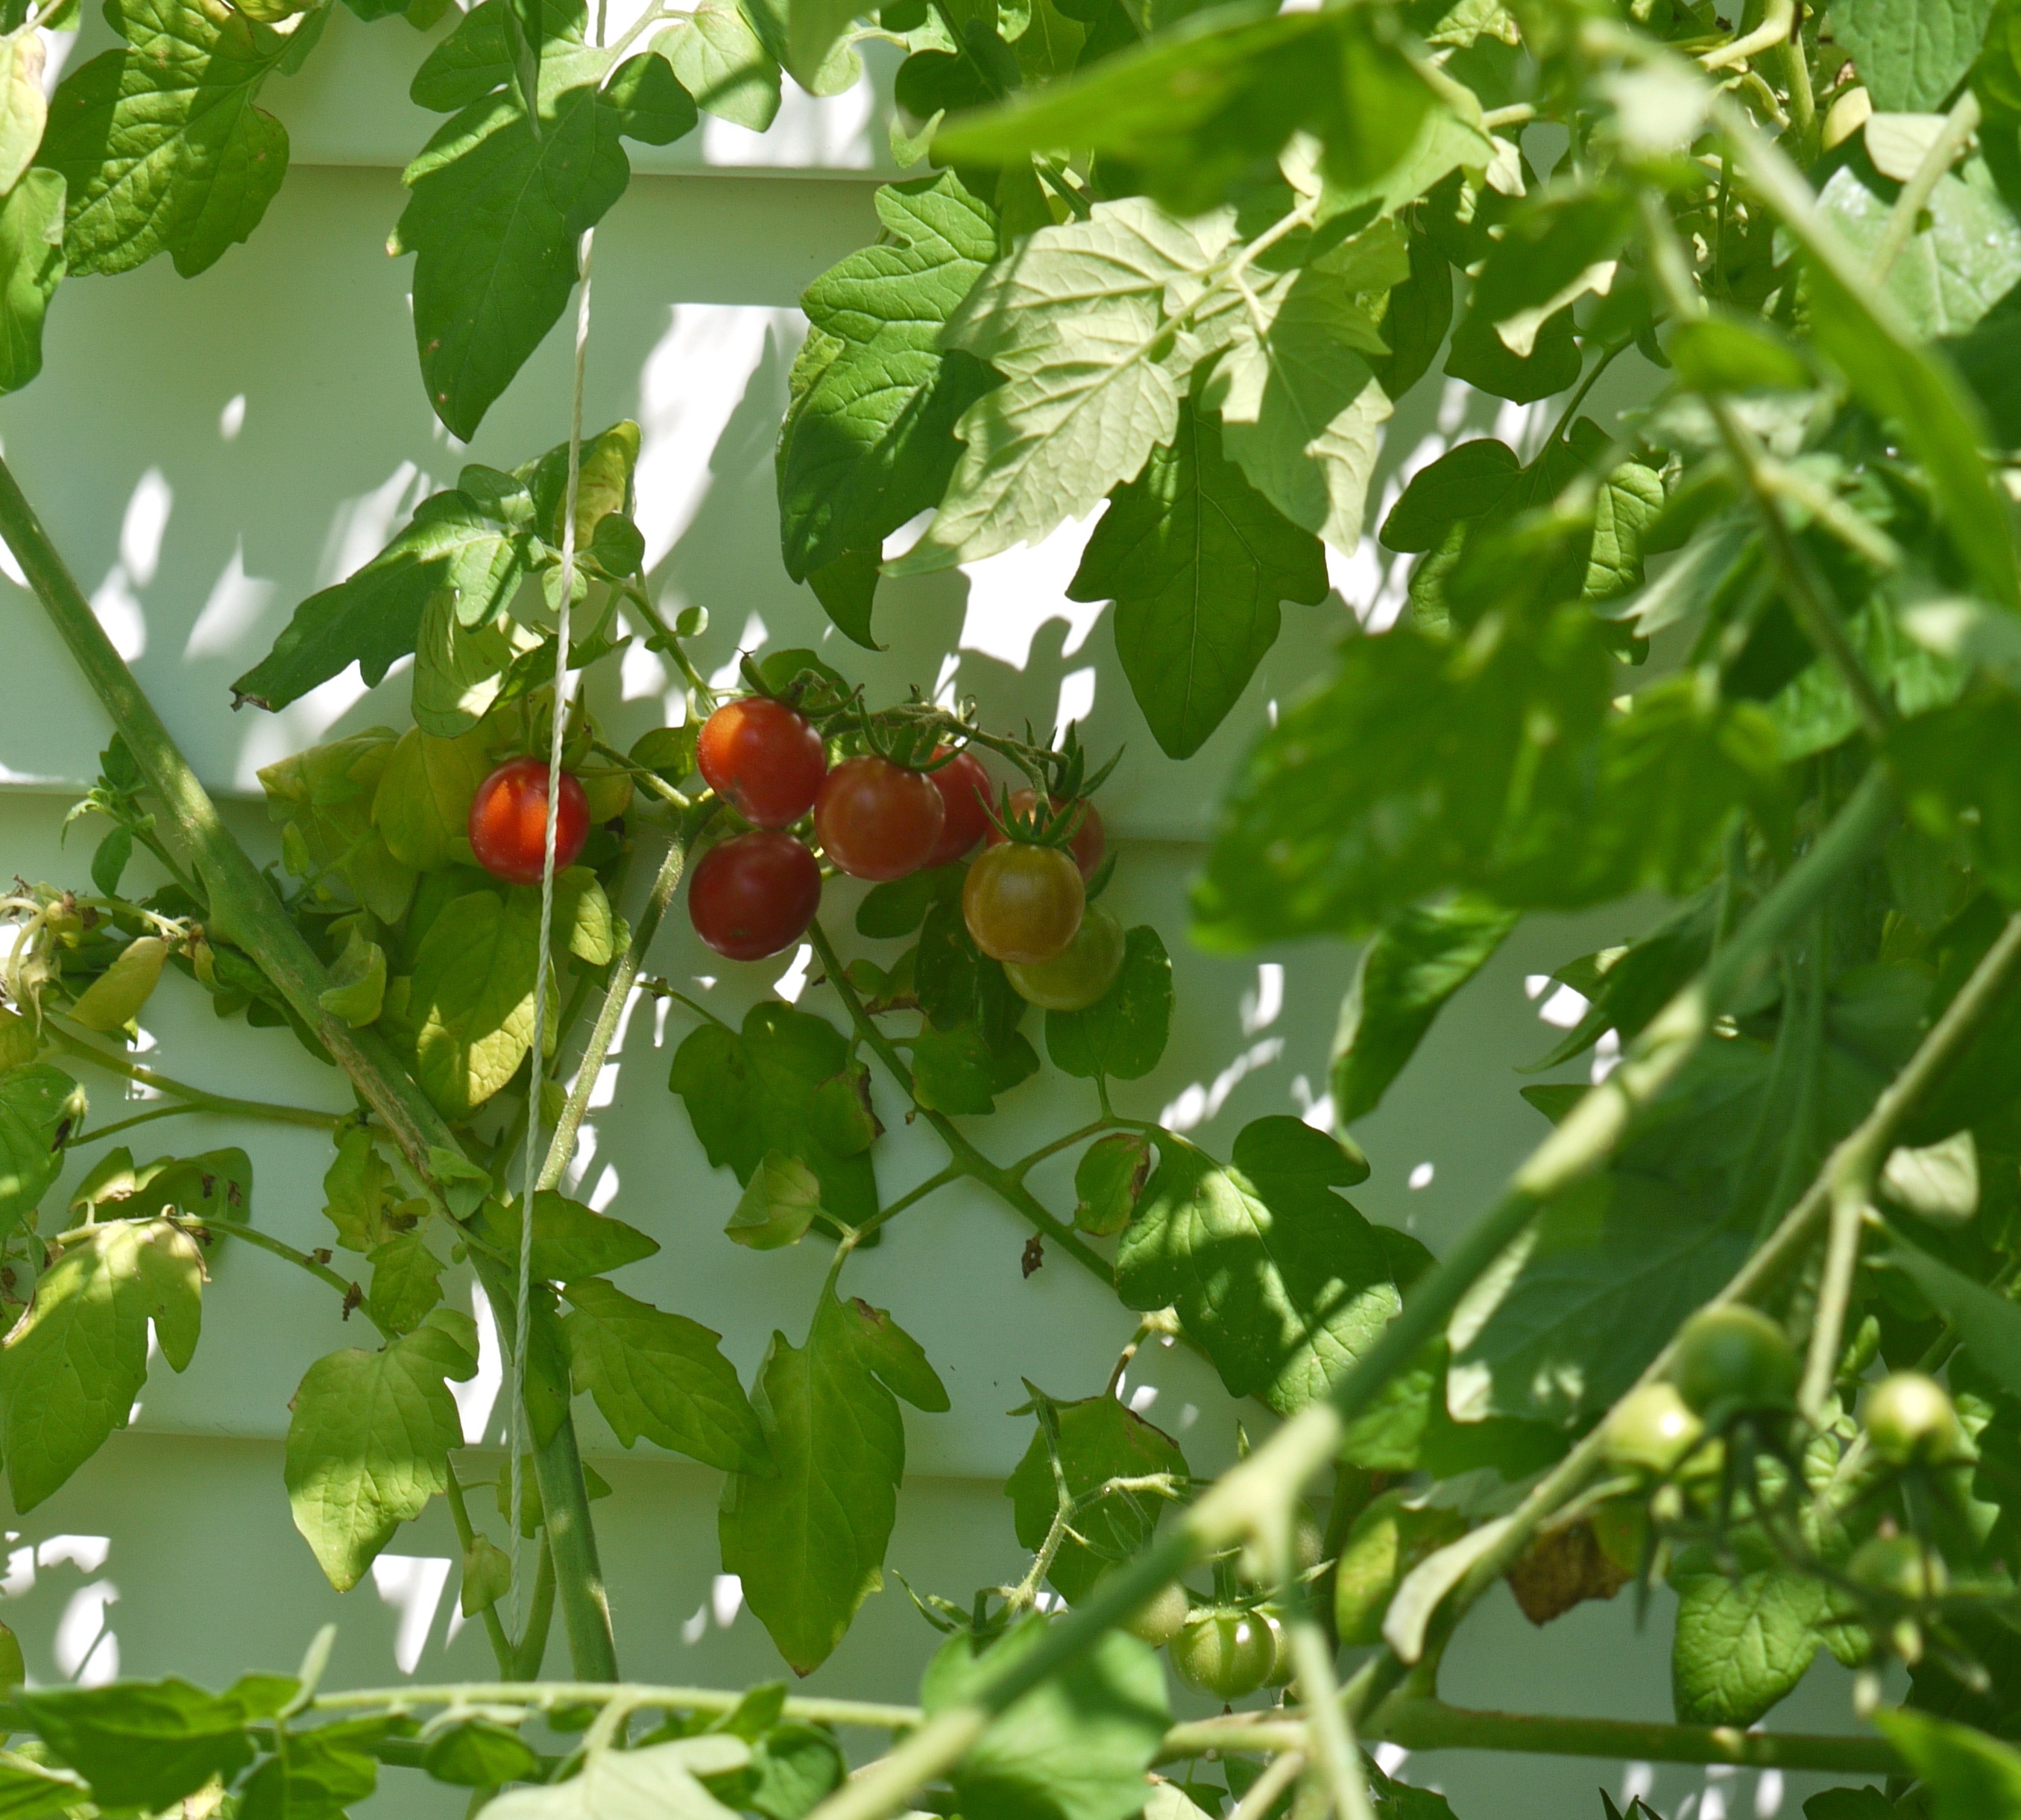
Have you ever noticed dry, sunken patches of decay on the blossom end (opposite the stem) of your tomatoes? The spot will be small at first, dark green, and watery. It will eventually turn tan and produce a large, leathery area. Sometimes the lesion will turn black because of the presence of mold. What you have observed is not a disease but a physiological disorder called blossom-end rot.
Unavailable Calcium is the Problem
Blossom-end rot is caused by unavailable calcium . It’s possible that your soil is lacking calcium, but this disorder also shows up when moisture is inconsistent and although calcium may be present in your soil, it hasn’t been available to your plants because of dry conditions.
Blossom-end Rot Can Be Prevented
To prevent blossom-end rot, the first thing you need to do is test your soil. This will determine if, indeed, sufficient amounts of calcium are available. If the soil test shows a lack of calcium, and the ph of your soil is acidic, an application of lime will both raise the ph and provide calcium. If the test shows that your soil is neutral or alkaline, then gypsum should be used to provide calcium without changing the ph.
Secondly, be sure to provide sufficient water for your plants throughout the entire growing season. An inch of water per week is recommended. Do not allow your soil to dry out in between watering. A layer of mulch several inches thick is recommended to keep moisture from evaporating. If you use a hoe to cultivate around your plants, be sure not to damage roots. This can also prevent the uptake of calcium.
Over fertilization can also cause blossom-end rot. Over fertilization can cause rapid growth of the plant and nutrients such as calcium won’t be able to keep up with the growth. Soil testing is always recommended before fertilization. And if you concentrate on building soil, fertilization may not be necessary at all.
If blossom-end rot continues to plague your garden, choose varieties of tomato that are resistant. Varieties of tomatoes that produce large fruit tend to be more prone to blossom-end rot, while varieties with smaller fruit are less prone.
Has blossom-end rot been a problem in your garden?
Recommended Reading: The Organic Gardener’s Handbook of Natural Pest and Disease Control by Bradley, Ellis, and Martin
To learn how to build a garden that builds healthy soil, be sure to check out my eBook The Art of Gardening: Building Your Soil. You really can become a better gardener, and you really can grow healthy, nourishing produce. It’s all about the soil! Click here to buy now.
Photo Source
More Posts You’ll Love
How to Grow Tomatoes: From Seed to Harvest
How to Save Seed From Heirloom Tomatoes
Thank you for visiting Learning And Yearning. May "the LORD bless you and keep you; the LORD make his face shine upon you and be gracious to you; the LORD turn his face toward you and give you peace." Num 6:24-26
Deb says
Thank you for this! Great information, as always!
Keith Jones says
I’ve heard of it, never seen it, but this is my first year growing tomatoes from seed. It probably helps that the water in our area is LOADED with calcium. I’ve practically got rocks pouring out of the faucet.
Susan says
Wow, I guess you won’t have any problem then!
Donna says
When I plant my tomatos I put a chopped up banana peel and some crushed egg shells and a little epsom salts mixed with some potting soil in the hole first, I get great tomatos!
Keith Jones says
I get the epsom salt for magnesium, I get the egg shells for calcium, but what does the banana peal do?
Susan says
potassium
Keith Jones says
Oh! Nice!
Katharina says
Hi! Thanks so much for this post. Very timely for me. I am learning about it as it’s affecting my squash and I’m glad to read this BEFORE it affected the tomatoes, too!
Susan says
Glad to help!
Jessica says
Thanks for the info! I experienced this last year, mainly on my Roma tomatoes, but fortunately it seemed to go away after the first few days of ripe tomatoes. We had a severe drought in WI last year so our garden was watered somewhat inconsistently, so far this year we have had lots of rain so hopefully we’ll be good this year. We still ended up with an abundance of wonderful tomatoes last year, hoping for the same this year!
Susan says
Sounds like it will be a good year!!!
Summers Acres says
I just wanted to stop by and let you know that your post will be featured at tomorrow’s The HomeAcre Hop. I will also tweet, like, and +1 your post. Please stop by and grab the featured button at:
http://summersacres.blogspot.com/2013/06/the-homeacre-hop-25.html
Congrats!
~Ann
Susan says
Thanks, Ann!
Missy says
Wow! This is wonderful and perfect timing! I just pulled a tomoto off our Beef Master that has BER! We were plagued with this last year and hoped we would do better this year. Thanks for the great information!
Susan says
Great – I’m sure it will be a better year now that you are armed with some info.
Carol J. Alexander says
I just heard, and tried this year, putting egg shells in the holes when I planted the seedlings. Will see how that helps. Thank you for linking to the HomeAcre Hop. I hope to see you back this week: http://everythinghomewithcarol.com/the-self-sufficient-homeacre-hop-5/
Susan says
The eggshells should help!
Nancy@livininthegreen says
It has been a problem and I mostly notice it if I water infrequently. I heard that adding a bit of lime to the water before watering really helps to prevent it and I did this after my first bout with it. Thanks for the info…good and helpful stuff!!
Nancy W says
Another great post, thanks for sharing on The Home Acre Hop! This year it hasn’t stopped raining so we’re not having any problems with things getting too dry! Looking forward to what you’ll share this week!
On The Home Front
Eric says
Usually, when tomatoes succumb to blossom end rot, it’s only the fruit that lacks calcium, while the rest of the plant has plenty. Over-watering and soggy soil are the culprits.
lisa lynn says
Great post! Congrats on your feature on on Wildcrafting Wednesday! Hope you can join us again today 🙂
http://www.theselfsufficienthomeacre.com/2013/07/wildcrafting-wednesday-27.html
Teda says
I tilled in granulated gypsum this past spring, and what a great difference it’s made with everything I planted. The formula is calcium sulfate, which also adds essential sulphur (or sulfer) to soil. It dissolves slowly as long as there’s adequate water, and loosens heavy and compacted soils for better air, water, and nutrient uptake by all plants, as well as better soil drainage. Soil that’s too wet and/or too cold early in the season can also encourage BER later on, usually in the first fruits. Gypsum helps with the drainage, but it can’t change the temperature, so black plastic covers help speed soil warm-up.
A 50-lb. bag of gypsum was only $11.50 at my local farm and feed supply.
The other thing I did that was different this year was add corn meal to the planting holes for my tomato plants. I read that it prevents fungus, so I tossed some in each hole and mixed it around. Very good crop this year, and so far no problems — except for a few hideous hornworms. I’ll till again in the fall, which is supposed to kill 90% of the overwintering larvae.
Susan says
Wonderful!! I’ve also had some success with cornmeal preventing fungus, and even stopping it in it’s tracks.
GeorgiaCowboy says
You could also have the same problem (and same solutions) with peppers.
Eddie Joe Sharp says
In my part of middle Tennessee the soil lacks calcium so I always work crushed clam shells into the soil before planting tomatoes or peppers. It works.
Susan Vinskofski says
What a great idea. Thank you for stopping by and sharing!!!
cami says
Hi! great news about tomatoes as I am a fairly new gardener (kind of). But regarding the calcium in the soil, when you suggested the addition of lime, was that a typo? shouldn’t it have been lyme?
Susan Vinskofski says
Hi Cami, I guess that depends on where you live. Here in the U.S., it is spelled lime but is not to be confused with the fruit. 🙂
NolaM says
Learned this trick from the gramma in the community garden next to mine
She plants a 2 ft pipe and a 8 ft pole next to her tomato plants. about 8″ of pipe out of the dirt.
Then adds about an inch of peat moss or humus rich mulch around her plants.
Directs the hose to these tubes, waters from the bottom.
The peat moss keeps the moisture in and no weeds.
Ties her tomatoes to the pole with old panty hose.
Rows are about 24″ apart, plants are 18″
I add eggshell, epson salts, and use diluted aged chicken Poop compost tea.
and Plant Black Russians, Heritage Yellow and cherries.
She likes miracle grow and 20-20-20.
Hers are better looking but mine taste and store better. LOL
Susan Vinskofski says
I really LOVE the pipe idea. Sounds like you have a wise gramma in your community garden! Thanks for sharing.